Explainer Tip: Creating Simple Storyboards
This post is part of a series designed to relate the big ideas behind conceiving and producing amazing explainer videos.
In my last post, we discussed what goes into creating a script for an explainer video. Your script contains the words that will be read for the voice-over in the video. It’s under 500 words and tells the story of a person who learns about your product and uses it to accomplish a goal. You’ve received feedback from customers and even family on your script.
Now that you’ve edited it a few times, you’re ready for the next phase: the storyboard.
Nearly every movie or commercial has something important in common: each scene is planned out before any video is shot. An important part of this process is called storyboarding. It allows producers and directors to see and evaluate low-fidelity versions of each scene. Usually, storyboards are hand-drawn representations that capture sets, characters, and ideas that will appear in the final product.
Your explainer video is no different. An important step in creating the video involves thinking carefully through each scene and how the visuals will work with the voice-over. By planning the scenes in a storyboard, you can further ensure that it’s understandable.
NOTE: If you're interested in learning in-depth about the skill of explanation and how to make Common Craft Style videos, check out our online courses at the Explainer Academy.
A Few Tips to Start
At Common Craft, we storyboard every video we produce. Like the script, it’s a cheap and easy way to make changes and refine the story before production begins. I’ve provided instructions for creating a storyboard below, but first, a few rules of thumb:
Keep visuals simple: Your goal is to be understandable and complicated visuals may work against you. Everything that appears on the screen should be there for a reason.
Focus on the big picture: It's easy to get caught up in the details of every scene. You'll have time to work through them before or during production. In the beginning it's important to keep your eye on the overall story and how the big ideas fit together. Once you get that right, the details will be easier to manage.
Look for visual metaphors or themes. Some of the best videos have a visual theme--a visual or symbol that is woven into the video across multiple scenes. Having a theme can help the video feel cohesive and unique.
Beware screenshots and interfaces. Always remember that your video wants to live forever. One change to a product’s design can make a video look out-of-date. To avoid this, use symbolic versions of products, websites and interfaces. Keep it simple. This can help the video remain evergreen, even if designs change.
Use text sparingly. Unlike a conversation, you have only one chance to deliver your points to the viewer in a video. Use too many on-screen words and you may lose them. Remember that the beauty of video is the combination of visuals and voice. I recommend using visuals that support the words in the script and create a package that appeals to both the eyes and the ears.
How to Create a Simple Storyboard
For most explainer videos, storyboards can be hand-drawn using basic tools that enable you to plan the video. You can, for example, simply draw boxes on a sheet of paper to create a very simple storyboard. There are also a number of storyboarding tools online like Storyboard That.
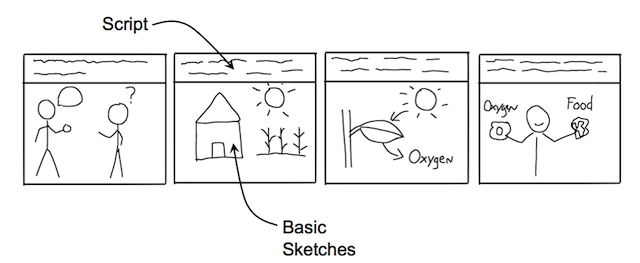
Most storyboards have two elements that work together: the script and the visuals. Our focus here is storyboarding with simple, hand-drawn visuals.
Create A Storyboard Template with PowerPoint
At Common Craft, we use PowerPoint to create and print storyboard templates that help us plan the video using handdrawn sketches. Here’s how:
1. Create blank slides. Open PowerPoint or Keynote and create blank presentation slides. Make sure the title section of each slide is available. Start with 8 or 10 blank slides.
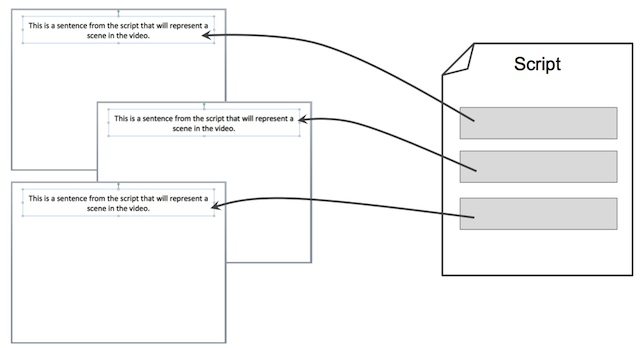
2. Add your script to the slides, scene by scene. Copy and paste sections of your script into the title section of the slides in order. You should end up with a deck of slides that represent each scene in your video.
This process creates a template that provides two important items:
- The script for each scene.
- A place to draw the scene’s visuals based on your script.
3. Print the presentation. Instead of printing whole slides, print multiple slides per page (we do six scenes per page). You’ll see that this provides a space for sketching your storyboard, scene-by-scene, with your script in-place.
4. Sketch your story. You don’t need drawing skills. Using basic stick figures and symbols, draw each scene of the video using the script as a reference. Read the script aloud and imagine what visuals would work for that scene and draw them on the page.
Here’s an actual thumbnail storyboard from a Common Craft video:
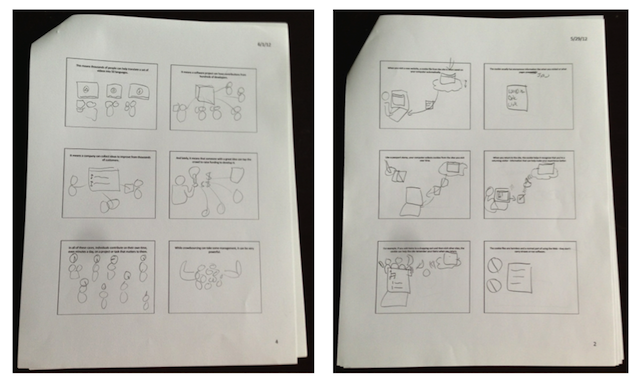
Tip: Print multiple copies and have team members do their own storyboards. Save the template for other projects.
You’ll find that this process will force you to think about the script as well. Remember to ask yourself: Does this make the idea more understandable?
5. Revise, Revise, Revise. Now is the best time to make changes and consider new opportunities. Get feedback from others, looks for themes and note the visuals you'll need for the actual video. When you feel good about the storyboard, you’re ready for production and turning the script and visuals into an explainer video.
Using the Storyboard for Video Production
Once you have the video visuals prepared, you can assemble your video, scene-by-scene according to the storyboard. Whether it’s live-action stop motion animation like Common Craft or digital animation using PowerPoint or DIY animation with GoAnimate, the idea is the same. Before long, you’ll see the ideas you drew in stick figures come to life. Thanks to storyboarding and consciously planning your video, you’ll increase your chances of creating an effective and high quality explainer video.
Are you ready to learn the secrets to explanation excellence? Check out our online courses that the Explainer Academy.
